Use Cases
Retarget lapsed customers with personalized promotional campaigns using Looker and Facebook


As customers progress through the customer journey, it’s not uncommon for some to become inactive after making an initial purchase. In fact, studies have found that the average firm loses between 20%-40% of their acquired customers each year.
As you look for ways to grow the business, it’s important to remember that just because a customer has become inactive does not mean that your relationship with that customer is lost forever. On the contrary, investing in reconnecting with lapsed customers can be significantly more efficient than acquiring new customers for a couple of reasons:
- You know who your lapsed customers are, and as long as they haven’t opted out of communications, you have a more direct means of communicating with them than you do anonymous potential customers
- By utilizing lapsed customers’ past engagements and purchase history, you can deliver reactivation experiences than are in-line with their interests
Understanding who your lapsed customers are, what they’re interested in, and reaching them with relevant promotional campaigns requires the integration of several business systems. This use case will walk through how you can integrate data across Looker, mParticle, and Facebook to retarget lapsed customers with personalized promotional campaigns.
Step 1: Design your query in Looker
Looker makes it easy to run granular queries in any SQL database and visualize the results for your team. To identify a segment of lapsed customers, you can define filters based on order count, order frequency, and latest purchase date in Looker explores. Looker will pull the results of your query into a table. You can also define calculations to your table, such as customer LTV based on their purchase history.
Step 2: Forward your query to mParticle
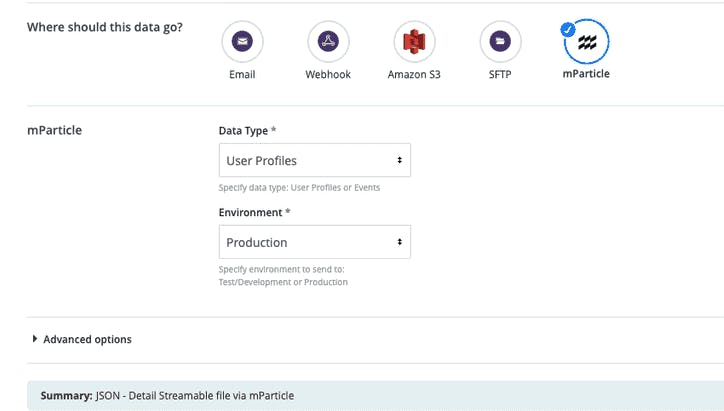
Within Looker, the mParticle Action enables users to send their query results directly from Looker to mParticle. For this use case, you can send profile attributes as “User Profiles” and send the query to mParticle. Within mParticle, the order count, order frequency, last purchase date, and segment name from your Looker query will appear in mParticle on each customer profile.

Step 3: Build your Audience in mParticle
Next, the user attributes forwarded from Looker to mParticle can be used to define an Audience. Within mParticle's Audience Builder, you can build dynamic segments by filtering for any events or attributes tied to the customer profile. Building an Audience from your Looker query can be done by defining the user attribute ‘Lapsed customers’, the name of your Looker query. If you’d like to define your Audience further than you did in Looker, you can add additional criteria and filter by any data points on your mParticle customer profiles, such as page views, geo, shopping cart abandonments, and more.
Step 4: Connect your Audience to Facebook
Within mParticle, you can connect your Audience to Facebook in just a few clicks using the Facebook Audience integration. The Audience will appear in Facebook as a Facebook Custom Audience (mParticle’s Facebook Audience integration does support Facebook’s Value-based Audiences). By default, mParticle forwards updates to Facebook either when 750,000 messages are in the queue or when 3 hours have passed since the last update.
mParticle’s Looker Feed integration enables you to activate robust BI insights across 280+ marketing and analytics tools. mParticle Facebook Audience integration allows you to build dynamic Facebook Audiences based on data collected from across channels. By connecting both systems with mParticle, you’re able to retarget lapsed customers with promotional campaigns without requiring engineering to manage data flows between systems.


