Use Cases
Increase margins using personalized promotions with Talon.One
Businesses are always striving to come up with new ideas and innovative methods to increase margins and protect profitability in a growingly competitive landscape. If executed properly, promotions can be a highly effective way for brands to achieve both of these outcomes while simultaneously driving customer loyalty.
Like every other aspect of your customer interactions, however, promotions are most effective when they are personalized to individual customers rather than rolled out with a “one size fits all” approach. mParticle’s integration with Talon.One gives brands a powerful way to deliver the right promotion to the right audience at the right time.
For one retail company, a promotion campaign powered by this integration led to 135% increase in units per order, and a 772 basis point increase in their margins. One specific offer ‘50% off one item’ was even responsible for increasing margin, demand, and conversion rates by 30%, 37% and 19% respectively.
In this use case, we’ll walk through the steps this brand took to leverage mParticle and Talon.One to execute a dynamic discounts campaign that translated their cross-platform customer data into personalized and effective promotions.
Step 1: Define a segmentation and engagement strategy
First you need to define your use case. Since your objective is increasing margins through promotions, you should define your segmentation and engagement strategies. The following questions will help you define effective Audiences in mParticle:
- What users/user categories do you want to target and why?
- Which customers are more sensitive to discounts/promotions?
- How do you want to engage with your target audience?
- How do you want to measure the success of your campaign? What are your metrics?
- What specific promotional solution(s) do you plan to use (discounts, bundling, referrals, etc)?
Streamline your website integrations
Learn which third-party integrations you could replace by adopting mParticle

Step 2: Create an Audience in mParticle
After defining your use case, you should create an Audience of the desired target users who will receive your offer:
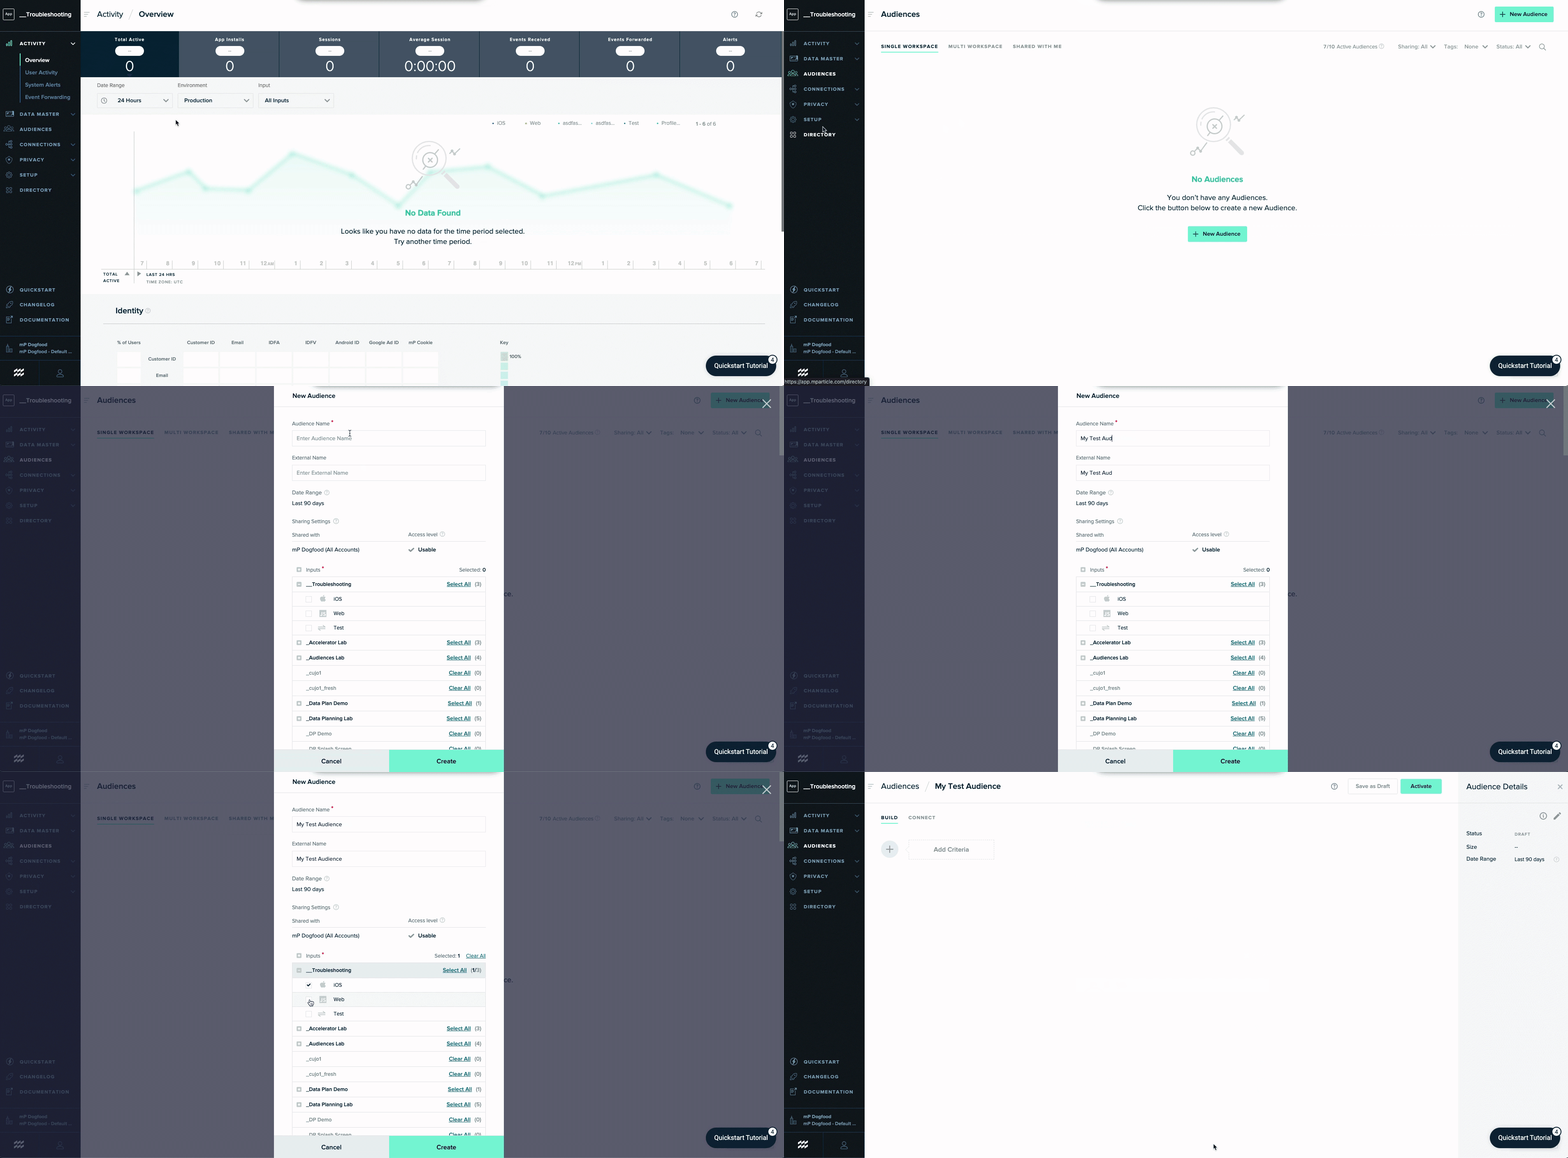
- Select Audiences from the main navigation, and then select either Single Workspace (which includes customer data from a single mParticle workspace) or Multi Workspace (which can combine data collected across workspaces).
- Click New Audience, then enter an Audience Name. You also have the option to provide an External Name, which is an alias displayed when forwarding Audiences to third-party services to ensure confidentiality.
- Under Inputs, check all the Platforms and Feeds whose data you want to use to define the audience.
- Click the Create button. The screen refreshes with the new Audience added to the list of audiences and the Audience Details screen shown. If you are ready to define the audience, continue in the next section. Otherwise, click Save as Draft.

Step 3: Define criteria for your audience
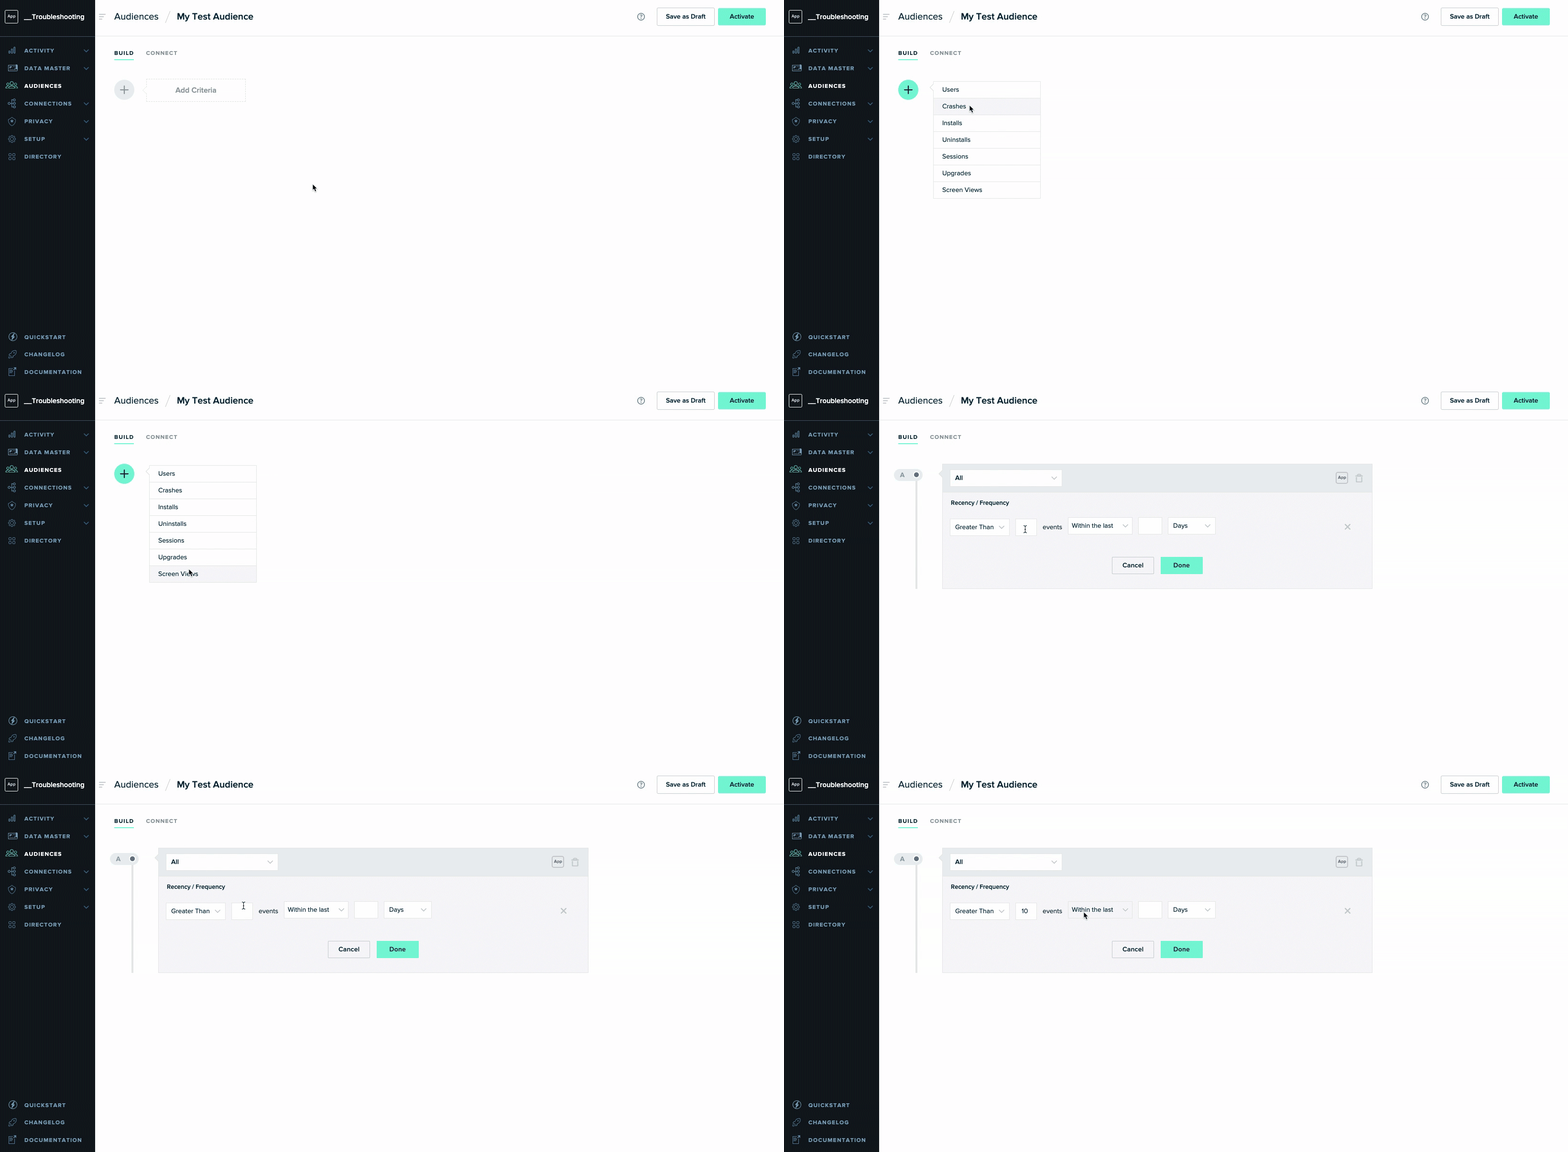
Now that you have created your audience and set its inputs, the next step is to define the criteria by which customers will be added to this audience. You can define criteria based on event or user profile data, and string conditions together with “And”, “Or”, and “Exclude” logic. By being very specific with your criteria and logical definitions, you can create granular audience segments for personalization.

Step 4: Connect Audience to Talon.One
With your audience now defined, use mParticle’s Talon.One Audience integration to set up a connection between your mParticle workspace and Talon.One in just a few clicks. Once the integration is set up, head over to Talon.One where you will now see your currently configured mParticle audiences in your dashboard. Select the mParticle audience you would like to forward to Talon.One, then specify the trigger conditions that indicate when your audience should be updated. For this use case, you can set a Rule Engine campaign to run when a new user joins your audience.
Step 5: Define any rules for your campaign in Talon.One
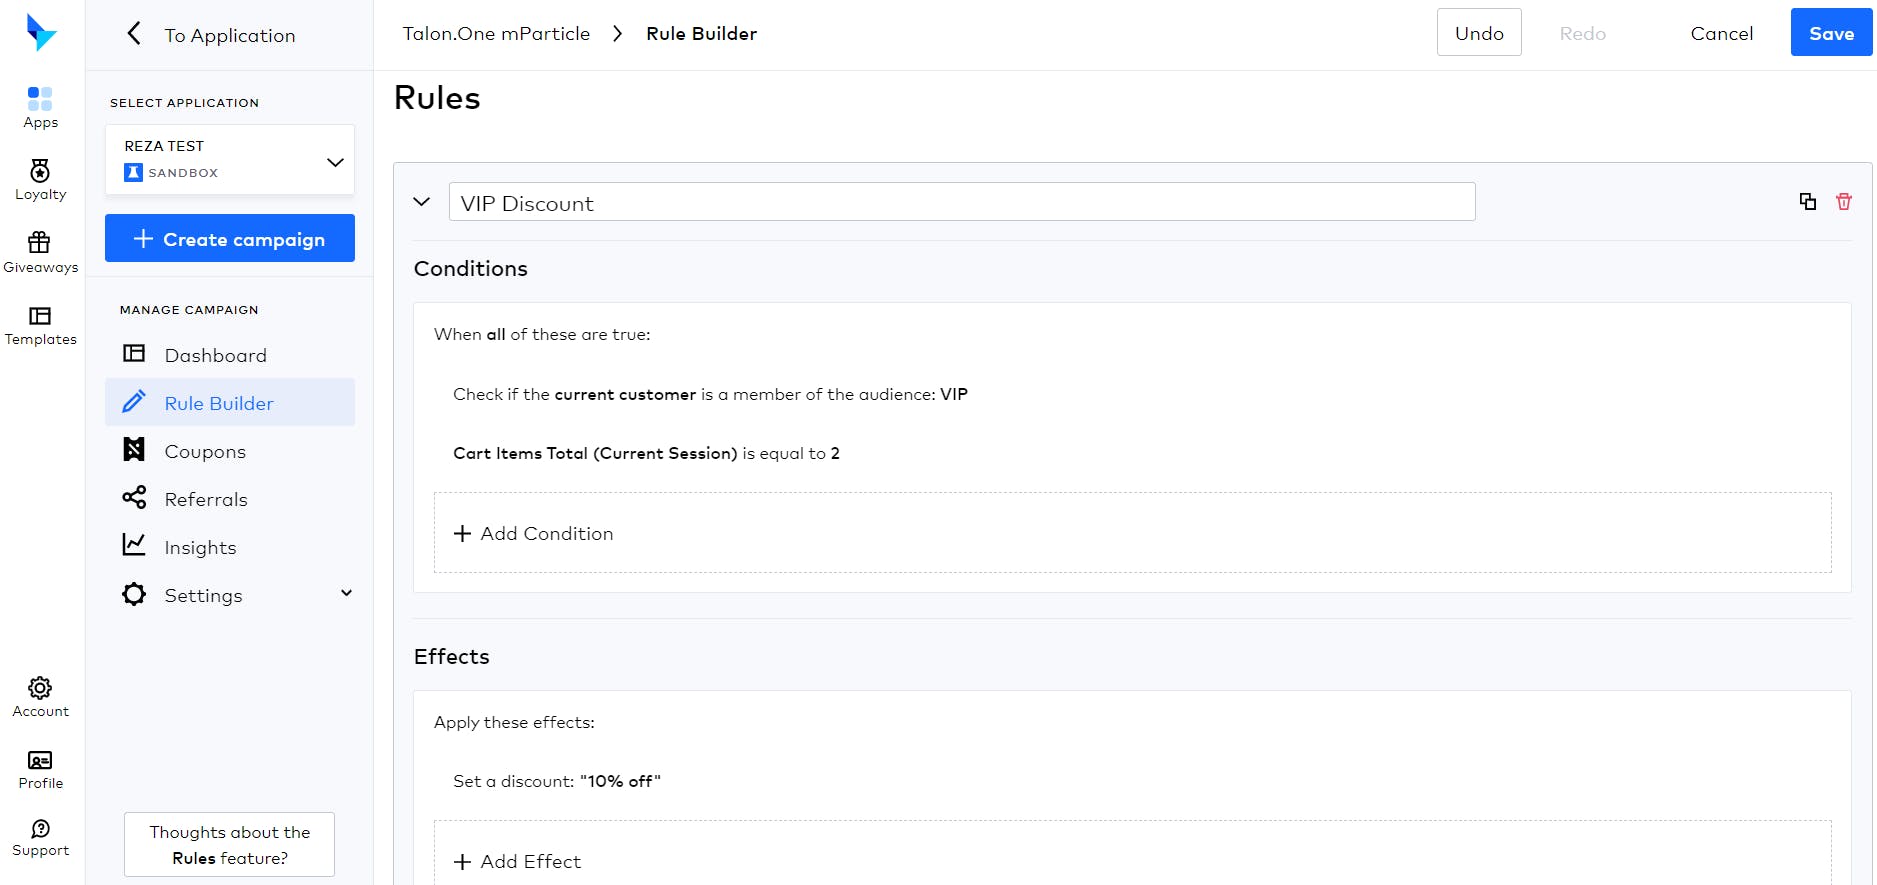
With Talon.One’s Rule Builder, you can create rules that define the logic of your dynamic discounts campaign. It is available on the left-side menu of every campaign.

Rules are defined by conditions (the criteria that trigger an action) and effects (the action(s) that will be taken as a result of the criteria). By using conditions and effects in Talon.One, you can execute a wide variety of personalized promotional use cases, like sending a user a discount once they have completed a specific set of actions in your app, or delivering a notification once a user has initiated a specified number of sessions.
Step 6: Activate personalized promotions using Talon.One’s Rule Engine
Once your personalized promotions are in flight, you can use your customers’ reactions to offers like coupon codes, discount campaigns, loyalty programs and referrals to enrich your audiences in mParticle and continue to hone your campaign targeting. This is done through mParticle’s feed integration with Talon.One, which allows you to send audience enrichment data back to mParticle via a webhook.
With the flexibility and customizability of mParticle’s Audiences and Talon.One’s Rule Engine, you can create a wide variety of Audiences and deliver personalized promotions to your customers at scale. As a result, you can maximize the ROI of your promotions by sending the right offers to the right audience at the right time.

