Use Cases
Improve data uploads and enable custom analytics with Redshift

Amazon Redshift is a service by AWS that provides fully managed warehousing with an enterprise relational DBMS and supports client connections with numerous applications, such as reporting tools, analytical tools, and enhanced business intelligence (BI) applications. Redshift can operate on a petabyte scale if needed and allows you to query large amounts of data in multiple-stage operations. Data is backed up by very efficient storage and optimum query performance solutions working through a massively parallel processing and query execution.
In this use case, Mighty Digital, an mParticle Solution Partner, breaks down how you can connect mParticle to Redshift to enable custom analytics based, based on their work with mParticle customers.
Step 1: Align to business needs
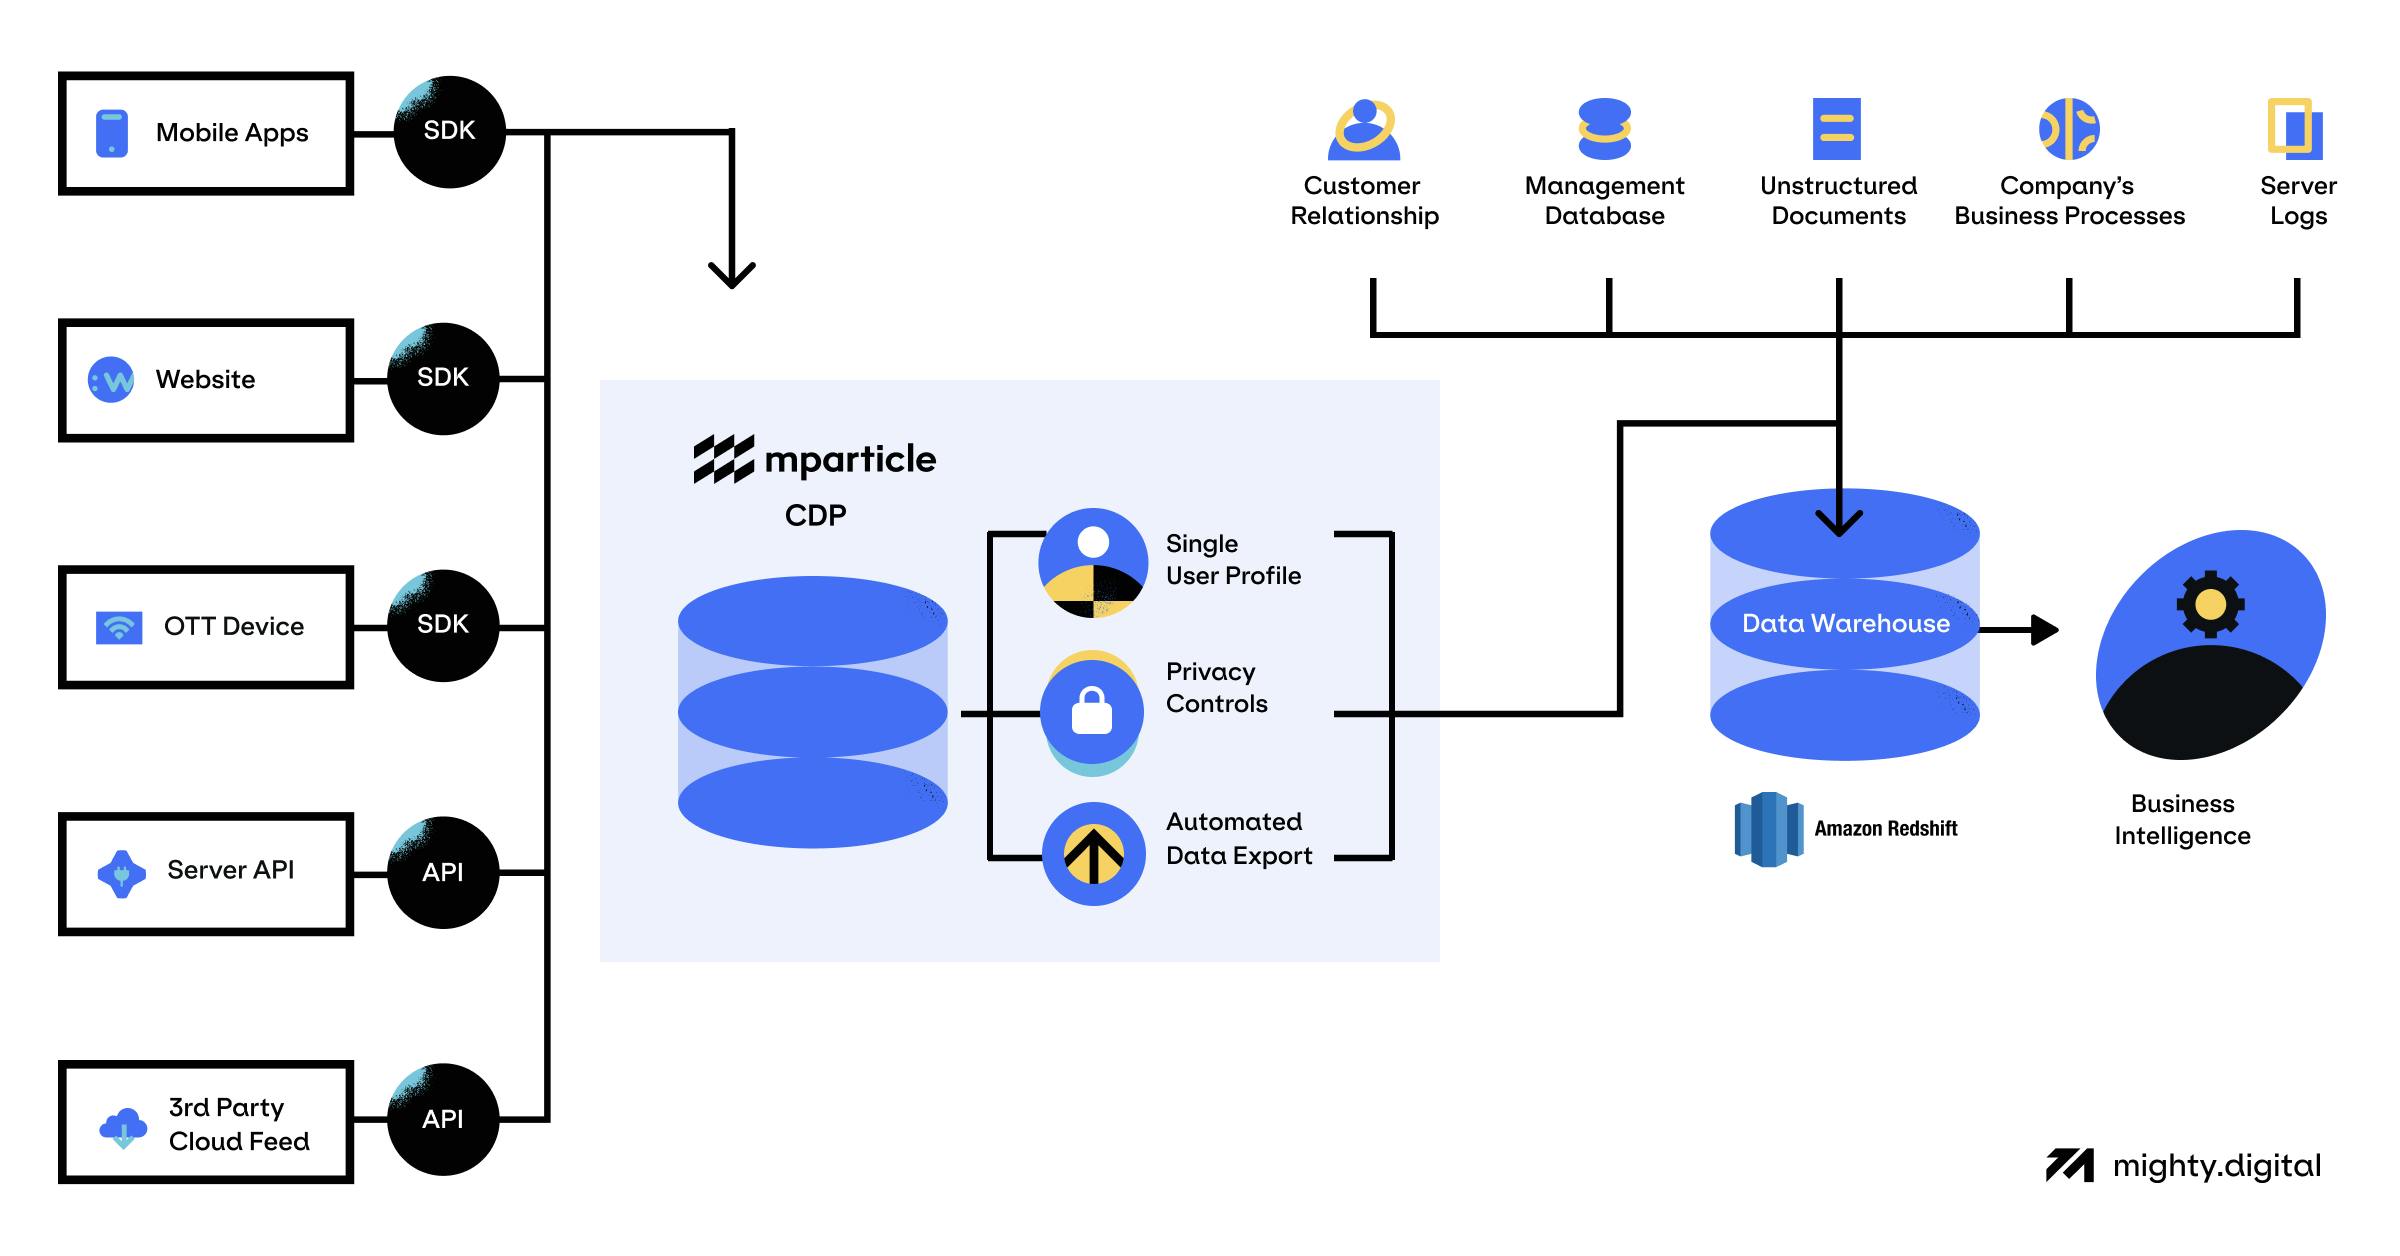
mParticle users often configure their mParticle workspace with multiple data sources. When Mighty Digital were working with their client, a leading transportation company, they had data collection implements in both iOS and Android apps. The flow was also enriched with website data, back-end data, and multiple third-party feeds.
A common challenge many businesses face is a multitude of data coming in from different sources in different formats and specifications. This requires data teams to spend a lot of time and resources building pipelines that convert and normalize the data into a suitable format for analytical or business needs. mParticle automatically adapts data collected from different sources to a consistent format, relieving those data engineering resources and increasing the speed with which teams can analyze and activate customer data.
Step 2: Create and configure a Redshift instance
Whether you already have your Redshift instance or not, the first thing you need to do is to create a new separate database user and set appropriate permissions. The reasoning here is simple. You would want to ensure that every incoming data agent with access to your data storage is strictly regulated, isolated, and monitored to decrease the chances of unintended data access. With a separate database user, the mParticle agent will only access the allowed resources within your data warehouse. Any data points will be out of reach and safe from potential threats.
Here is the mParticle's step-by-step manual that will help you right away.
Step 3: Enable data warehouse output and connect it to Redshift
After successfully integrating the configuration in the previous step, you can connect every input to the Redshift output from the Connections page. For that, make sure that the data warehouse connector is enabled. Follow the detailed instructions for the Redshift connector.

Step 4: Test, configure and verify
Now it's high time to test the connection. Fortunately, mParticle has built-in functionality that helps with that process. The interface allows you to provide access credentials and change the specifics of how data will be treated in the Redshift. You can change the strategy for table data splitting, set up a custom threshold, switch the automated data hygiene that will auto-purge all expired data from the Data Warehouse, and even configure the delays between each data block load.
The interface will help you understand potential problems via interactive error messages guiding you through invalid permissions levels, incorrect access credentials, and any other issues with the connection.
When the test is done, in the end, you also need to choose the preferred replication frequency and threshold.
If you need to enable DSR (Data Subject Request) forwarding, keep in mind that there are some changes in how DSR requests are forwarded to data warehouse outputs, including Amazon Redshift.
Step 5: Build custom data analytics dashboards based on customer behavior
By unifying customer data from mParticle with the data you already have in the data warehouse, you can do lots of amazing things. For example, you can:
- Visualize users' paths between different parts of your application
- Use all of the data sources integrated through mParticle and leverage them to see the whole picture of the user within your data warehouse and your visualization tool
- Connect any other data points in your data warehouse, and use them together to build a complete picture of the user

