Announcing our Apple SDK integration
The introduction of tvOS expanded the app and media universes to new possibilities. Possibilities which come with even greater challenges managing, understanding, and acting upon data. More than ever, a data platform becomes imperative to navigate gracefully through a world of dancing information landscapes.
That’s why we’re thrilled to announce the mParticle Apple SDK, a unified SDK for iOS and tvOS development. It’s a powerful instrument to manage your data whether you are developing single or multi-platform apps.
If you are already familiar with iOS you will feel right at home with tvOS, given the number of overlapping features shared between the operating systems. The differences are subtle but necessary due to the different nature of tvOS.
A few notable examples:
- Battery, or the lack thereof: tvOS devices are, most likely, constantly connected to a power outlet. And although this does not mean you should disregard best practices for implementing efficient code, it means that you have more wiggle room to use power
- GPS, or the lack thereof: It is unlikely someone will use an Apple TV for turn-by-turn navigation. Ergo, if you are sharing code between iOS and tvOS and your app uses a location based service, you have to be able to handle that when your code is running on tvOS
- User Notifications, or the lack thereof: This is a divisive feature with many advocates from both sides arguing in favor or against it. Again, you need to take that into account if your code is multi-platform
- Storage and filesystem: The use of iCloud is highly encouraged by tvOS. Moreover, NSUserDefaults can only store up to 500KB of data, and the filesystem is not guaranteed to live between application launches (it is mostly to be used for caching and temporary files)
When working on a multi-platform app to run on both iOS and tvOS you can choose to have separate projects one for each OS (which entails duplication of code and a plethora of other challenges), or you can opt to have a single project with two targets, allowing you to share most of the code between the two platforms.
For the rest of this article we will take a look at how the multi-platform sample app was built and how we used the mParticle Apple SDK to define and collect data points from it.
Getting started
Let’s start by cloning the mParticle Apple SDK from GitHub and taking a look at the project in the Example directory:
>git clone https://github.com/mParticle/mparticle-apple-sdk.git
- Change to the Example directory
cd mparticle-apple-sdk/Example
- Install the mParticle Apple SDK pod
pod install
- Open Example.xcworkspace in Xcode
If you want to see how the apps look like and run, go ahead, select either the iOS_Example or tvOS_Example scheme, build and run. We will wait for you.
The Data Plan
Good data management starts with a good data plan or data strategy. For our sample app we want a simple, however comprehensive data strategy:
- Determine how long it takes between launching the app and the user choosing the first video stream
- Count how many videos streams are played/consumed within a session
- Count how many videos streams are played/consumed within a user’s lifetime using the app
- Log an event when a video stream is played or paused
- Establish a user identity
The Sample App
Our sample app presents a list of titles, each one corresponding to a separate video stream (all video streams are licensed using Creative Commons). Once a title is selected, the respective video stream starts playing.
Since this is a multi-platform app, one of the objectives is to share as much code as possible between the platforms, yet implementing the correct user interface and appropriate interactions for each of them.
Building the App and Implementing the Data Plan
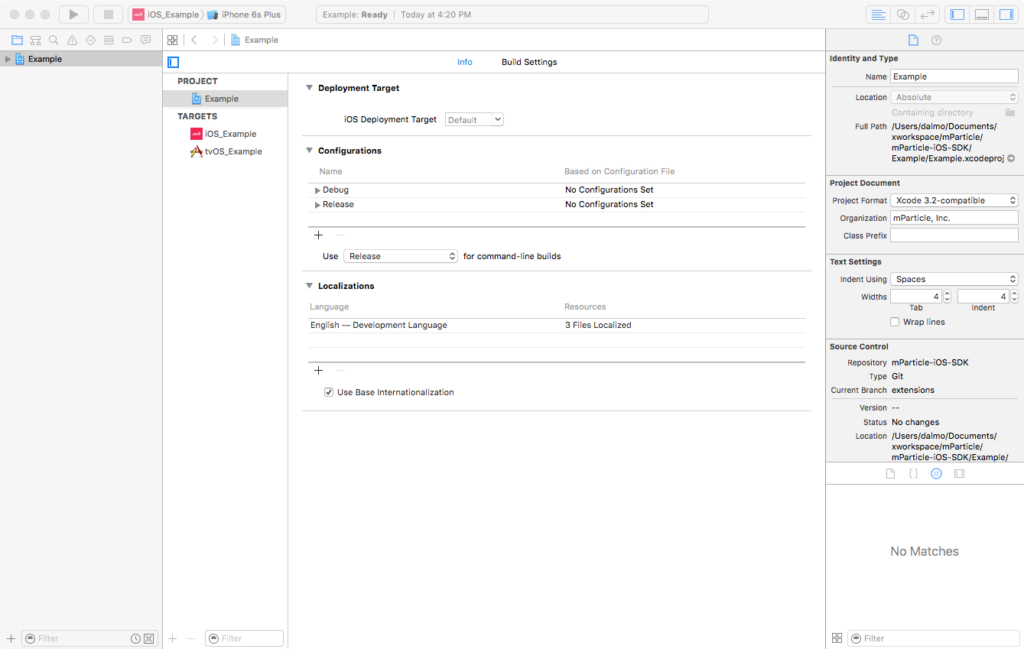
From Xcode we created a project called Example and added two targets: one for iOS and another one for tvOS.
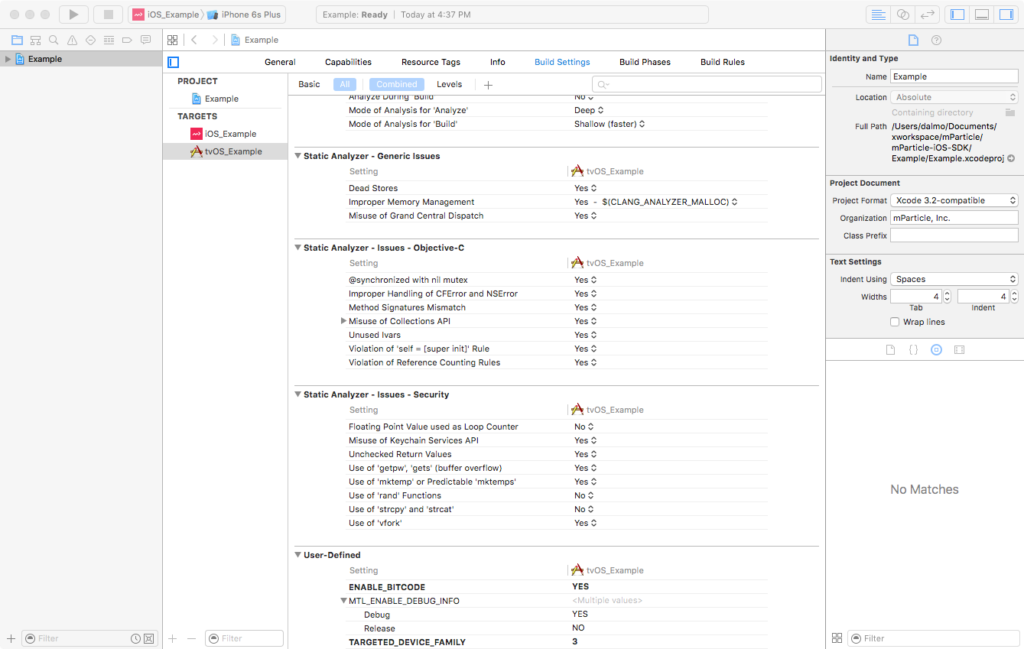
In the tvOS target we needed to inform the Targeted Device Family to be the Apple TV (TARGETED_DEVICE_FAMILY = 3) and whether bitcode is enabled (ENABLE_BITCODE = YES). You can find the configuration under the Build Settings tab in the tvOS_Example target.
Each target has its own App Delegate and Storyboard. However, they share the View Controller to present the list of available video streams, playback, and manage the data. In each App Delegate we import the mParticle Apple SDK and start it in the application:didFinishLaunchingWithOptions: method.
iOS App Delegate Implementation:
#import “AppDelegate.h“
@import mParticle_Apple_SDK; // Imports the mParticle SDK
@interface AppDelegate()
@end
@implementation AppDelegate
– (BOOL)application:(UIApplication *)application
didFinishLaunchingWithOptions:(NSDictionary *)launchOptions
{
UISplitViewController *splitViewController = (UISplitViewController *)self.window.rootViewController;
splitViewController.delegate = self;
// Starts the mParticle SDK
[[MParticle sharedInstance] startWithKey:@”Your_App_Key” secret:@”Your_App_Secret”];
return YES;
}
– (BOOL)splitViewController:(UISplitViewController *)splitViewController
collapseSecondaryViewController:(UIViewController *)secondaryViewController
ontoPrimaryViewController:(UIViewController *)primaryViewController
{
return YES;
}
@end
tvOS App Delegate Implementation:
#import “AppDelegate.h“
@import mParticle_Apple_SDK; // Imports the mParticle SDK
@implementation AppDelegate
– (BOOL)application:(UIApplication *)application
didFinishLaunchingWithOptions:(NSDictionary *)launchOptions
{
// Starts the mParticle SDK
[[MParticle sharedInstance] startWithKey:@”Your_App_Key” secret:@”Your_App_Secret”];
return YES;
}
@end
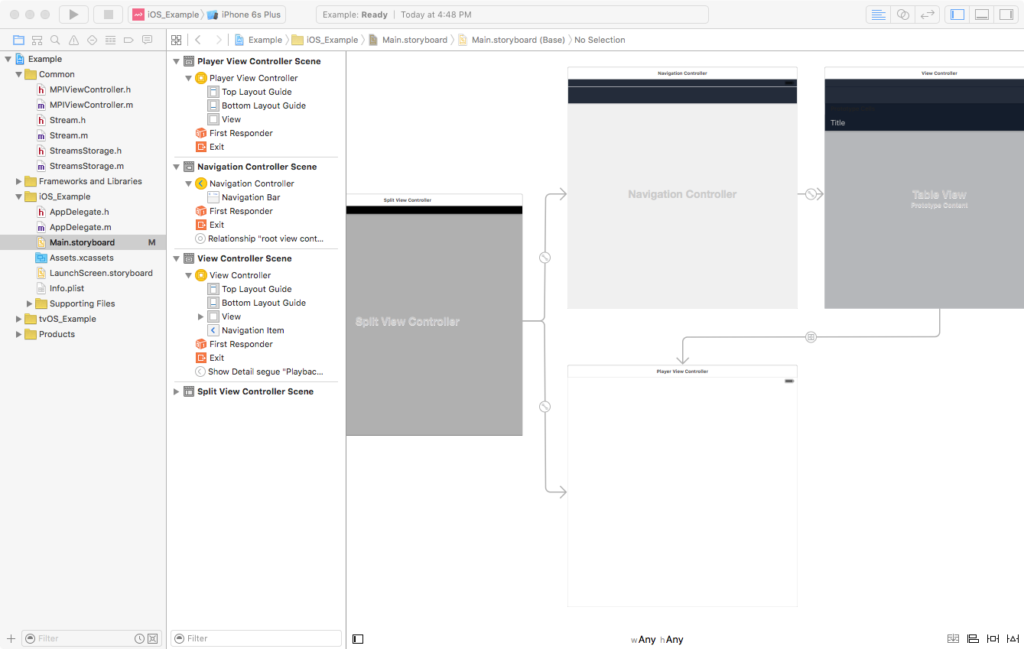
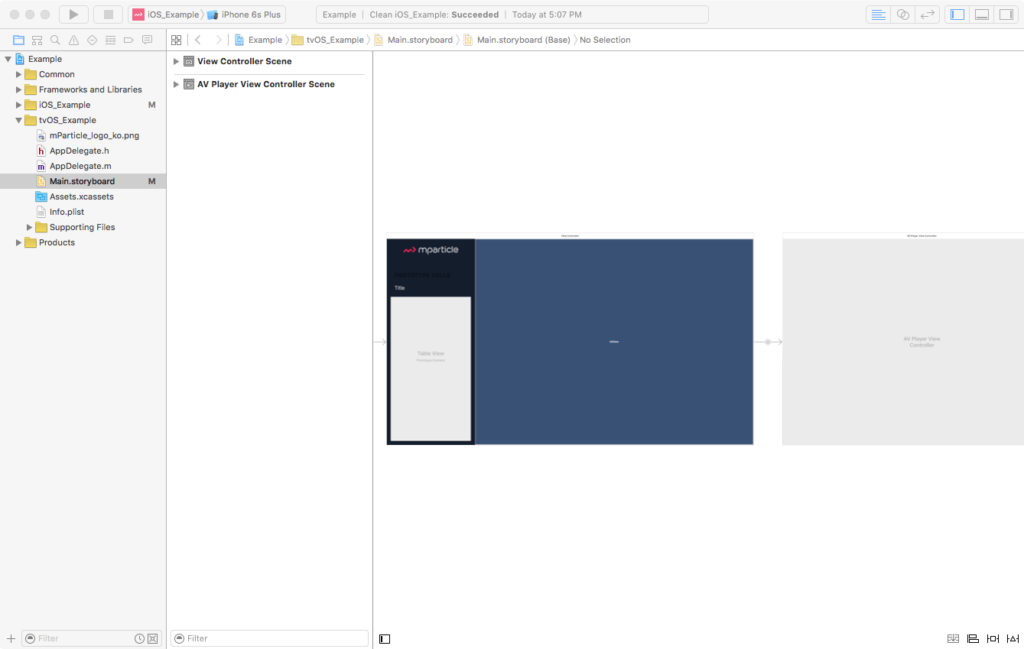
In the iOS Storyboard we used a Split View Controller, a Table View, an AV Player View Controller, and a Segue. Whereas in the tvOS Storyboard we used a View Controller with a Table View, a Container View to host an AV Player View Controller, and a Segue. In both cases the Table View will display the list of available video streams, and the Segue will invoke the code to start playback when a title is selected.
iOS Storyboard:
tvOS Storyboard:
Common Code Across Platforms
Now we get to the point where most of the code is shared between the two platforms. MPIViewController is the centerpiece view controller and where most of the action takes place in our sample app. Let’s take a look at a few key points in the code. (For the complete code implementation please see MPIViewController.m)
#import “MPIViewController.h“
#import “StreamsStorage.h“
#import “Stream.h“
@import mParticle_Apple_SDK; // Imports the mParticle SDK
@implementation MPIViewController
– (void)awakeFromNib {
//…
// Registering to receive a notification when an mParticle session begins
NSNotificationCenter *notificationCenter = [NSNotificationCenter defaultCenter];
[notificationCenter addObserver:self
selector:@selector(handleSessionDidBegin:)
name:mParticleSessionDidBeginNotification
object:nil];
}
– (void)viewDidLoad {
//…
MParticle *mParticle = [MParticle sharedInstance];
// Logs a screen view
[mParticle logScreen:@”Video Streams”
eventInfo:@{@”Launch”:@YES}];
// Establishes the user identity
[mParticle setUserIdentity:@”user@thisappisawesomewhyhaventithoughtaboutbuildingit.com”
identityType:MPUserIdentityEmail];
// Starts a time event named “First Selection Time” to measure how long it will take for
// a user to first make a selection of a video stream
MPEvent *timedEvent = [[MPEvent alloc] initWithName:@”First Selection Time”
type:MPEventTypeNavigation];
[mParticle beginTimedEvent:timedEvent];
}
– (void)handleSessionDidBegin:(NSNotification *)notification {
// Once the session start notification has been received, assign an attribute named “Playcount”
// to the current session. This will track how many plays were executed within a session
[[MParticle sharedInstance] setSessionAttribute:@”Playcount” value:@0];
}
– (void)playStream:(Stream *)stream {
if (currentStream) {
[self stopObservingPlayerProperties];
}
currentStream = stream;
AVPlayer *avPlayer = [AVPlayer playerWithURL:currentStream.url];
self.playerViewController.player = avPlayer;
[self startObservingPlayerProperties];
// Creates an event describing which video stream has been selected for playback
MPEvent *event = [[MPEvent alloc] initWithName:@”Video Playback” type:MPEventTypeOther];
event.info = @{@”Title”:currentStream.title};
MParticle *mParticle = [MParticle sharedInstance];
// Logs the event
[mParticle logEvent:event];
// Increments the number of plays in the current session
[mParticle incrementSessionAttribute:@”Playcount” byValue:@1];
// Increments the user’s lifetime number of plays
[mParticle incrementUserAttribute:@”Lifetime Playcount” byValue:@1];
// If an event named “First Selection Time” is present, retrieves it and logs a timed
// event measuring how long it took the user to make the first video selection
MPEvent *timedEvent = [mParticle eventWithName:@”First Selection Time”];
if (timedEvent) {
timedEvent.info = @{@”Title”:currentStream.title};
[mParticle endTimedEvent:timedEvent];
}
}
– (void)observeValueForKeyPath:(NSString *)keyPath ofObject:(id)object change:(NSDictionary *)change context:(void *)context {
if (context == (__bridge void *)PlaybackControllerRateObservationContext) {
if (currentStream) {
// Logs an event reporting a play/pause of the video stream
MPEvent *event = [[MPEvent alloc] initWithName:@”Video Changed Rate”
type:MPEventTypeOther];
event.info = @{@”Title”:currentStream.title,
@”Rate”:@(self.playerViewController.player.rate)};
[[MParticle sharedInstance] logEvent:event];
}
} else if (context == (__bridge void *)PlaybackControllerItemStatusObservationContext) {
AVPlayerItemStatus playerItemStatus = self.playerViewController.player.currentItem.status;
if (playerItemStatus == AVPlayerItemStatusReadyToPlay) {
[self.playerViewController.player play];
}
} else {
[super observeValueForKeyPath:keyPath ofObject:object change:change context:context];
}
}
@end
The code above show we were able to implement the data plan successfully. In the awakeFromNib method we register to listen to the session did begin notification and handle it in the handleSessionDidBegin: method, where we set a session attribute to count the number of plays within a session.
In the viewDidLoad method we establish the user’s identity and begin a timed event to measure how long it will take for the first video stream to be selected.
In the playStream: method we log an event describing which video stream has been selected, increment the playback counter for both the session and user’s lifetime, and conclude the timed event (if applicable).
Last, but not least, using KVO we log an event reporting when a video is played or paused.
CocoaPods Configuration
If, like our sample app, your app is also targeting iOS and tvOS in the same Xcode project, you will need to configure your Podfile differently.
Here you can see a sample multi-platform Podfile configuration targeting iOS and tvOS.
source ‘https://github.com/CocoaPods/Specs.git‘
inhibit_all_warnings!
# Replace with the name of your Xcode project name
xcodeproj ‘
# Contains a list of all pods which are common among the platforms
def include_common_pods
pod ‘mParticle-Apple-SDK‘, ‘~> 5‘
end
# iOS app
target :phoneApp do
# Replace with the name of the iOS target in your Xcode project
link_with ‘
use_frameworks!
platform :ios, ‘8.0‘
include_common_pods
end
# tvOS app
target :tvApp do
# Replace with the name of the tvOS target in your Xcode project
link_with ‘
use_frameworks!
platform :tvos, ‘9.0‘
include_common_pods
end
In the event your app is targeting only iOS or tvOS, but not both, the Podfile configuration follows the traditional format we are all accustomed with.
use_frameworks!
target ‘
pod ‘mParticle-Apple-SDK‘, ‘~> 5‘
end
Watch the Sample Apps in Action
Here you can watch a recording of the example app running on each of the platforms:
iOS:
tvOS:
That’s All, Folks!
We could not have been more excited to share this SDK with you.
