Smartype Custom Receivers
mParticle’s Smartype is an open-source tool that delivers data quality benefits to any engineering team, whether or not you’re working with an mParticle Data Plan. Here, we’ll review how to automatically generate typesafe libraries with Smartype, and learn how Smartype can send user events to any third-party database or library.
Watch a video on how to send your data to Fireabase or any other location with Smartype.
Maintain data quality across all platforms and devices
mParticle designed Smartype to function as part of an ecosystem of developer tools that brings data plans straight into the codebase, and help engineers prevent costly data quality errors while reducing the time it takes to implement cross-platform data collection. Within this developer toolkit is a CLI that allows engineers to always keep a current version of their data plan checked into source code, and linting tools that surface data implementation errors as engineers write code for iOS, Android and Web. Rounding out this trio is Smartype, which seamlessly translates any JSON schema into usable data collection libraries for iOS, Android and Web.
Our deep dive into Smartype’s generate function––the Smartype command that actually materializes these libraries in your project––walks through the process of getting Smartype set up and working on a JSON file. Here, we’re going to look at the next step in the process, which is sending data to an external source. Instead of sending out data to mParticle, however, we are going to direct the user events to Firebase––an open-source tool from Google that provides a variety of app services including a NoSQL database where our user event objects can be stored.
In our project, we already have one object in our data model that captures “product_name”, “product_price”, “product_category” and “product_availability” when our customers click on one of the preview images in the interface:
{
  "smartype_object_name": "view_product",
  "properties": {
    "product_name": {
      "type": "string",
      "description": "The name of the product."
    },
    "product_price": {
      "type": "number",
      "description": "The price of the product in USD."
    },
    "product_category": {
      "type": "string",
      "description": "The category under which the product is classified."
    },
    "product_availability": {
      "description": "Whether the product is in stock.",
      "type": "boolean"
    }
  }
}
Using Smartype generate, we took this data plan and created a Typescript file that includes, among other things, a viewProduct method that accepts each of this data plan’s properties as arguments, and enforces type consistency directly in our IDE:
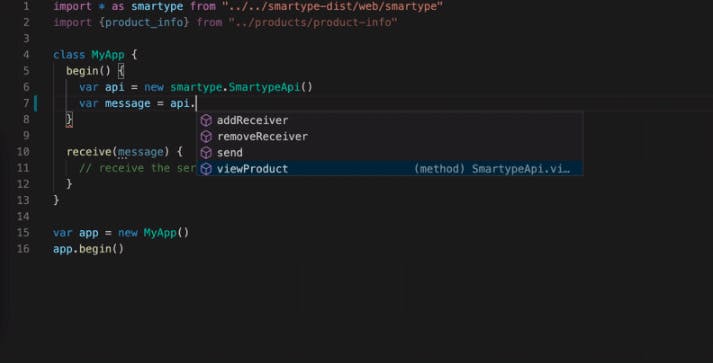
Smartype's IDE autocomplete feature prevents data quality errors before they occur.
Now we have a message object representing the product our customer viewed. While it’s nice to see it represented in our codebase, we will probably want to send this off to some location. Although Smartype was designed to work alongside mParticle data plans, you can use built-in methods on Smartype’s API to forward these user events to any location.
For this example, we’ll set up a Firebase realtime database to use as a custom receiver for the user event data we’re collecting with Smartype. If you don’t already have a Firebase project set up, go to the Firebase homepage and follow the steps to get started. After following the setup steps, click the gear icon on your project’s main dashboard, scroll down to the Firebase SDK snippet section, select the “config” button, and copy the config object for your project:
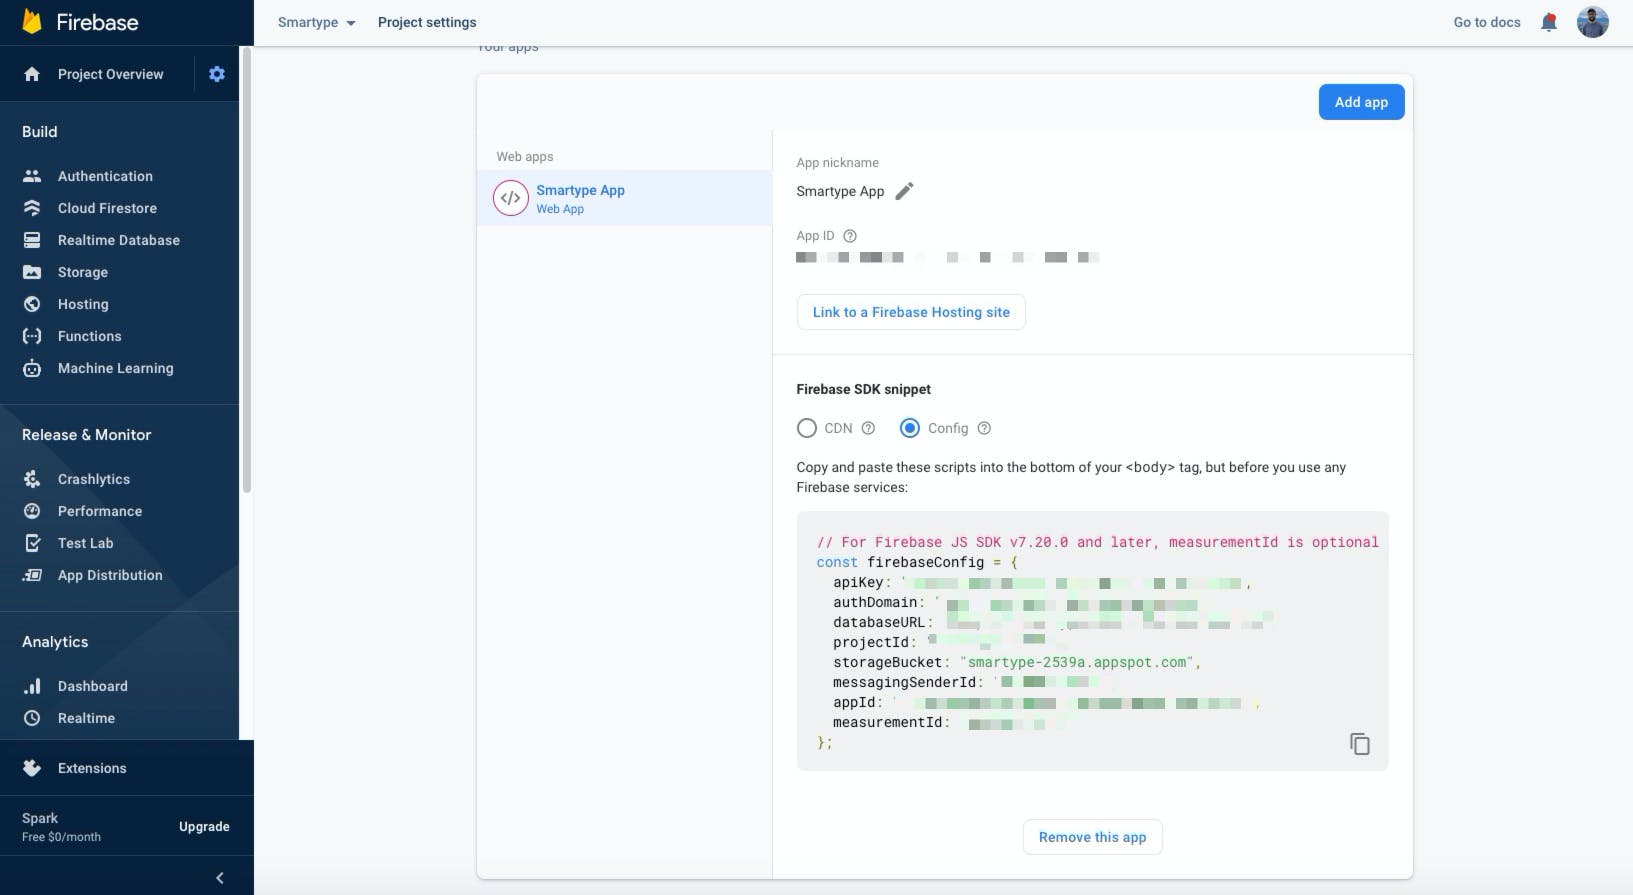
How to copy the configuration object for your Firebase project.
Back in our project, we will npm install Firebase in the directory where we’re using the Smartype libraries, then import Firebase into our main Typescript file. Next, inside the begin method on our MyApp class, we will add our Firebase configuration object, and call initialize app on our Firebase instance, passing in our config object as an argument.
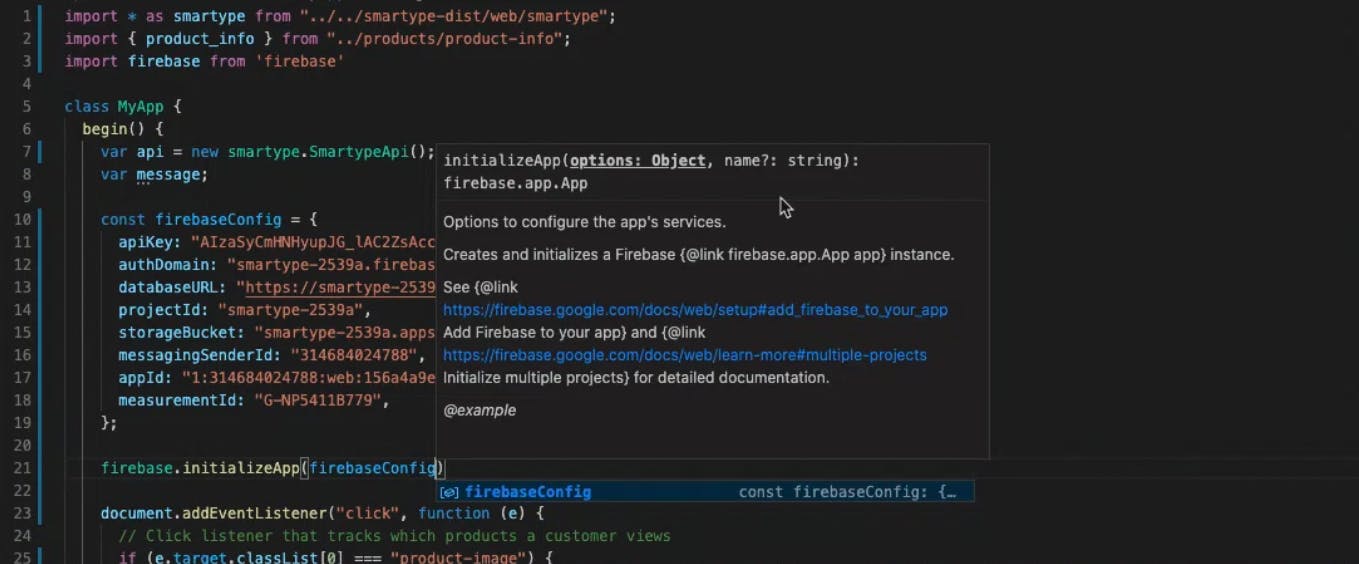
Adding the Firebase configuration to your app.
Now, we’re actually going to connect Firebase to Smartype as a receiver to which it can send our strongly typed data messages. From our previous setup, we already have a variable called api set equal to an instance of Smartype. This is what gives us access to Smartype’s methods within our local namespace, including the ViewProduct object that Smartype translated from our original JSON schema.
Now we’ll call Smartype’s addReceiver method, which can wrap any interface to which we want to send data, including our own inhouse processing. In this case we’re adding our Firebase configuration object, which we do by passing the this keyword to addReceiver: api.addReceiver(this);
In our receive method, we now need to do some work to translate this message into a consumable format for Firebase. Inside receive, we have access to the message object as a JSON string, not as a parsable JSON object, so we’ll use Javascript’s JSON.parse method to convert the message into an object whose values we can access directly:
receive(message) {
    let json = JSON.parse(message); // Converts JSON string into a consumable object
  }
Next, we create a local reference to the Firebase object, and use Firebase’s push method to append our database with an object containing the typesafe properties describing the product our user has viewed.
receive(message) {
    let json = JSON.parse(message); // Converts JSON string into a consumable object

    let database = firebase
      .database()
      .ref()
      .push({
        view_product: {
          product_name: json.product_name,
          product_price: json.product_price,
          product_category: json.product_category,
          product_availability: json.product_availability,
        },
      });
  }
Now, when a user clicks a product in our application, that product’s name, price, category and availability are sent to Firebase, where it is contained as an object under a unique identifier that Firebase generates for each new entry:
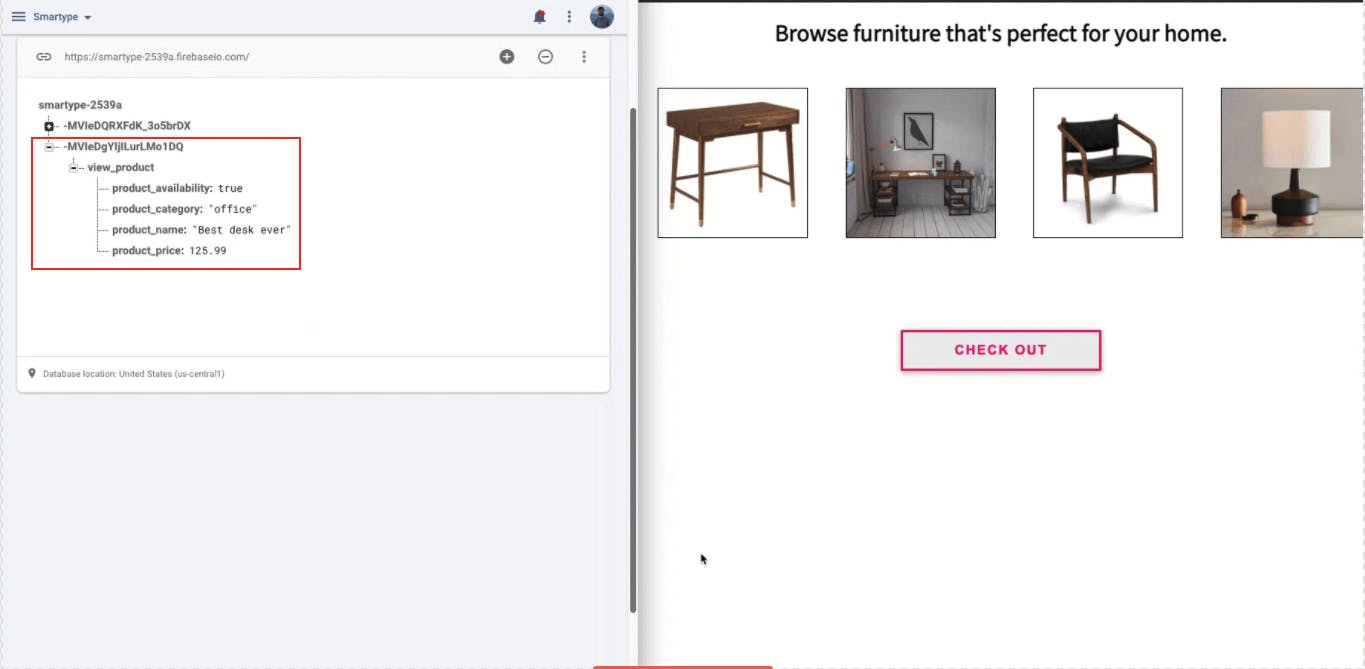
Event objects are sent to Firebase and stored under a unique identifier.
By sending data from our application to Firebase via Smartype’s custom receivers feature, we can see how any engineering team that collects cross-platform user data can benefit from the data quality advantages Smartype delivers, regardless of where that data is being sent, or whether or not the data collection schema originated from an mParticle data plan.
Learn more about Smartype here.
Play with this sample project and explore more ways to send data to a variety of sources.
Visit the Smartype repo to explore more ways to send consistent, quality data to Firebase or any other database your team is using.
